
Deploying Create React App With Firebase Hosting
Background
Sometimes deploying create-react-app can be tricky, especially when your app has multiple routes/pages even though at the end of the day it is just html, css & js. This is mainly because a react application is SPA - Single Page Application. All the routes in app needs to route through index.html
The good thing is Firebase Hosting takes care of setting up SPA configuration for you. By the end of this article you would be able to deploy a react application within minutes. I would also show you how to setup npm script for faster update deployments.
Prerequisites
Firebase hosting is free & it will automatically add SSL for your application so it is https by default. Before you continue, you would need following things done already.
- React Application ready for deployment.
- Signed up or logged in to Google Firebase
- Node v14+ and npm v7+ installed.
In case you do not have react app & you are here just to learn then get this sample react redux todo app. It also has 3 routes with one protected.
Setting up Firebase Project
After logging in to Google Firebase, head over to firebase console. If you are using firebase for first time, you will see a button saying Create a project something like below or if you have used firebase before then you would see Add a project button.
Once you click on the button, it will ask you to enter project name - this will be reflect in url of application. I have kept react-firebase-hosting-ka then put a check in Firebase terms checkbox & continue. On the next screen it would ask if you want to Enable Google Analytics for this project. If you have not created Google Analytics account before then turn it off & click on Create project button.
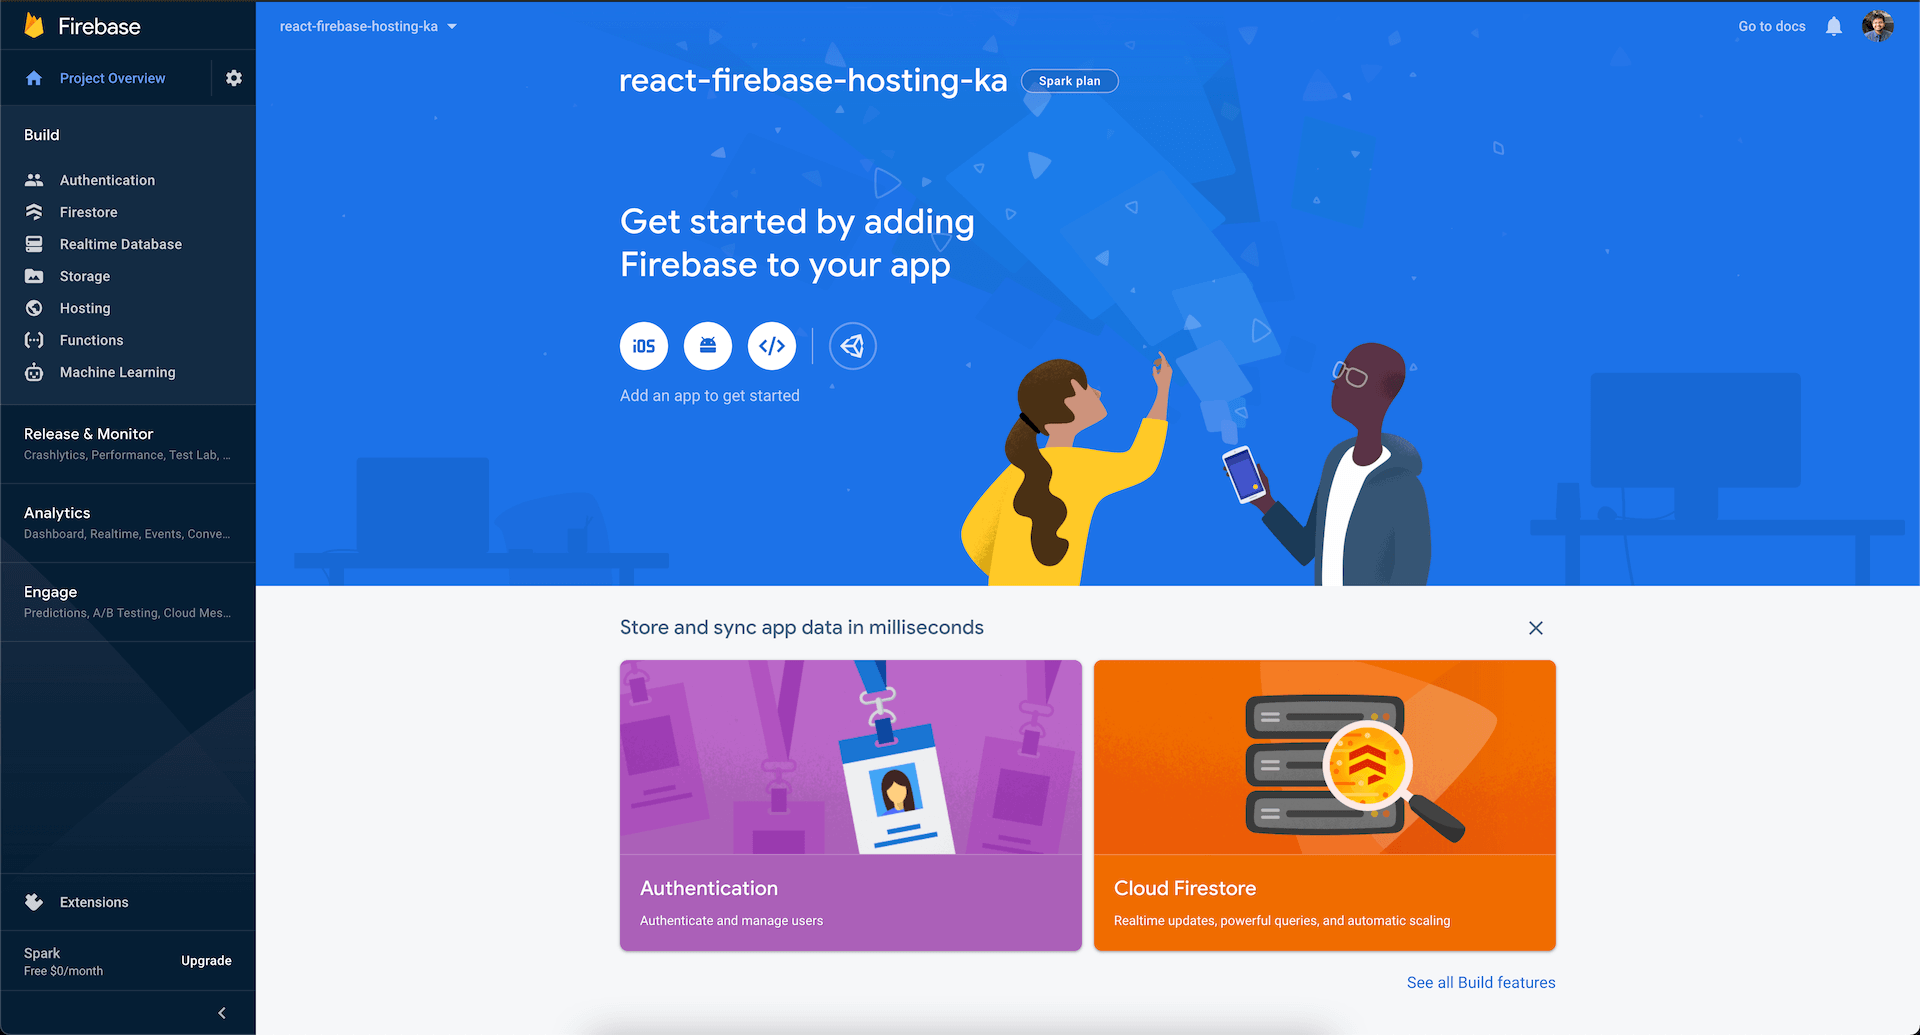
It will take less than a minute for Firebase to create project. Once done, click continue & you will land on project page in Firebase like below. From the sidebar select Project Overview > Hosting & then click Get Started button present in top Header.
Firebase CLI Setup
Open react project's root directory in terminal such that when you list directory (ls in mac/ubuntu and dir in windows) in terminal you would see package.json file listed. First thing you would want to do is install dependency packages if you haven't already. After that install Firebase CLI, this can take a minute or so.
% npm install
% npm install -g firebase-tools
You need to login into firebase cli using the same Firebase account you used for creating Firebase project above. Below are the steps to login and setup firebase inside react project.
% firebase login
This will first ask if you want to Allow Firebase to collect cli usage & error, you can type yes & press enter. It will open up new tab in browser prompting to login. Choose the account and click allow so that firebase cli will have permission to manage projects.
Create firebase project with firebase init & use down arrow key to navigate to hosting option, press space key to select option & then enter key. It will ask you select existing project or create a new one. We will go with existing project. From the list of projects shown, choose the one you created above in this article.
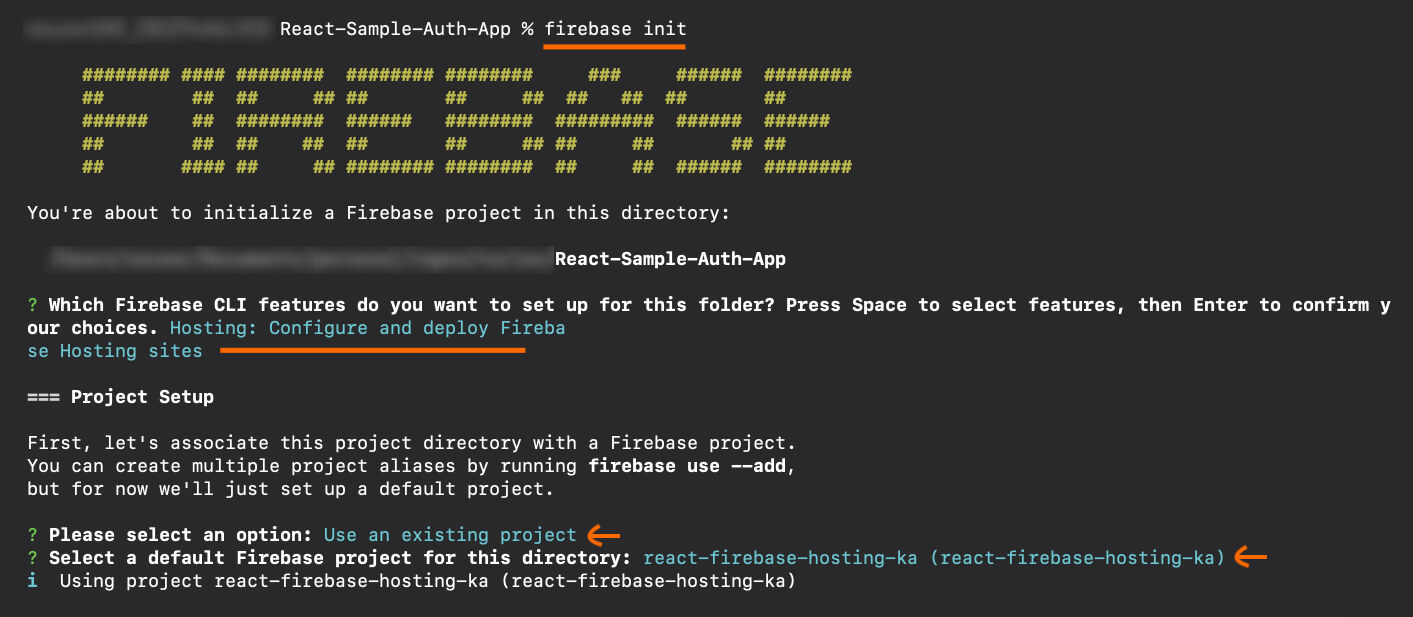
You will be asked to name public directory of your react project. Do not confuse with public directory inside react project. Firebase wants to know where your project build files can be found! By default when you run npm run build react scripts will generate production bundle in build directory. Type build & press enter.
Another important prompt, where it asks if you want to configure your project as SPA (Single Page Application). Yes, all react projects are typically SPAs. Next it will ask for automatic deployments with Github, we will do this some other day, for now enter No.
If you observe your project directory, you would notice two new files: firebase.json & .firebaserc the first one stores information about project configuration that would help while deploying your website. Which files/directory to ignore, considering app as SPA & the name of build folder i.e all sorts of information we provided in terminal above. The second file is about which Firebase project is this linked to.
Deploying & Hosting With Firebase
All the above process of setting up firebase project inside react app was one time process. It is fairly self descriptive process. We can now deploy react app with just two commands.
% npm run build
% firebase deploy --only hosting
The first command bundle up your project for production into build directory. The second command is the one that does the heavy lifting of deploying bundle to firebase.
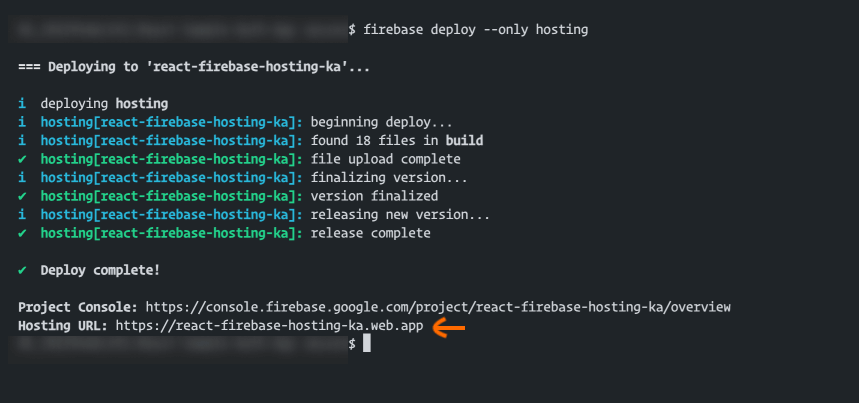
That is it your project should be now live, voila! The project I used throughout the article can be found here as seen in above screenshot.
Configuring NPM Scripts
There is one optional configuration we could do to create react project bundle & run firebase deploy in one go. Open up package.json file & add a deploy script like below.
"scripts": {
  ...
  "deploy": "npm run build && firebase deploy --only hosting"
},
Now whenever you run npm run deploy it will take care of creating the bundle and deploying. I hope this article was useful for you and served the purpose.
A Small Request From Your Fellow Developer 💙
What took you 10-15 minutes to read took me several days to perfect. And honestly? That's completely worth it when I know it saves you hours of frustration.
🫤 Here's the reality: Creating quality tech content takes countless late nights testing different setups, breaking my own system multiple times, taking screenshots at every step, and then rewriting everything until it makes perfect sense. If this helped you, please consider supporting my work! 🥳
{ "Small support": "Big motivation to create more content!" }